
DJI Osmo Pocket 3 Webcam Mode Setup, Audio, and Output Limits
Use DJI Osmo Pocket 3 as a webcam on Windows or Mac. Check USB setup, OBS 4K output, microphone selection, ActiveTrack and meeting-app limits.
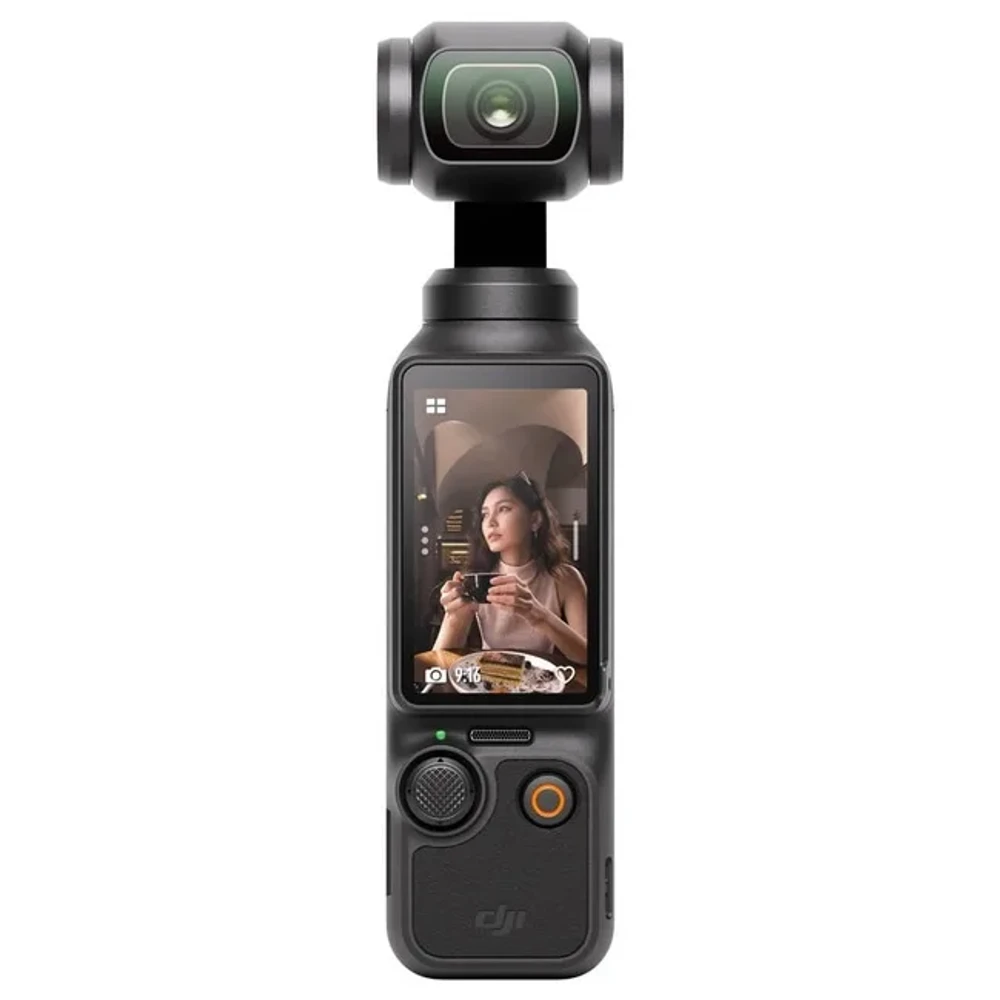
Yes, you can use the DJI Osmo Pocket 3 as a webcam over USB. Turn the camera on, connect it to your computer with a USB data cable, tap Webcam on its screen, and select it as the camera in your meeting or recording app. The app's microphone setting needs its own check.
Firmware explains some of the conflicting resolution advice online. DJI added 3840 × 2160 USB webcam output at 25 or 30 fps in firmware v01.04.08.02 on May 15, 2024. Check the date and firmware behind any resolution advice you follow.
We checked DJI's manual, support pages and cumulative firmware notes on November 3, 2026. This guide follows official documentation and includes a checklist for your own computer. We have not tested a physical Pocket 3 or measured call quality. The DJI Osmo Pocket 3 product page has the broader hardware reference.
Confirm the Model, Firmware, and USB Cable
These instructions cover Osmo Pocket 3. DJI's general webcam help page also covers several Action cameras and Pocket 4, so model-specific footnotes need care.
Start with an activated camera, a charged battery, a stable mount and a USB cable that carries data. A camera that charges through a cable has not yet demonstrated a working data connection. For initial troubleshooting, connect directly to the computer and leave hubs or docks out of the connection.
Record the camera's firmware version in Settings under Device Info. Check DJI Mimo for an available update before the rehearsal, with enough time to repeat your checks afterward. The cumulative notes linked from DJI's Pocket 3 downloads page currently begin with v01.06.10.04, dated August 26, 2025. Check the app for what your device is offered rather than treating this document's version as a permanent latest-version claim.
The documented USB webcam connection runs from camera to computer. You do not need an HDMI capture card for that route. DJI's product FAQ separately says a USB-C-to-HDMI cable cannot export live footage from Pocket 3.
Select Webcam Mode and the Correct Input
- Place the Pocket 3 on its mount with room for the gimbal to move. Route the cable so it does not pull on the camera.
- Power on the camera and connect its USB-C port to the computer using the data cable.
- Tap Webcam when the USB-mode choices appear. Confirm that the camera screen shows Webcam.
- Open the app you intend to use and choose Pocket 3 in its camera or video input list. DJI's examples also use the device name UVC Camera. The label can differ by app and system.
- Check the live preview, then choose and test the microphone separately before joining a call.
The Pocket 3 user manual describes the power-on, USB connection and Webcam selection sequence. Entering file-transfer mode gives the computer access to files; select Webcam for live camera input.
Use Pocket 3 as a webcam on Windows
DJI lists OBS Studio among its supported Windows applications. In OBS, add a Video Capture Device source and select the connected camera in its properties. Start with the device defaults to establish a picture. Then inspect the resolution and frame-rate choices exposed by the source.
For Pocket 3 in Zoom or Microsoft Teams, select the camera in the meeting app's video settings and check its preview. Use the app you plan to call with for this check.
If the camera is missing, check Windows camera permissions for the app you are using. Close other apps that may be using the camera, reconnect the USB cable and reopen the input list.
Use Pocket 3 as a webcam on a Mac
DJI's webcam help page gives Photo Booth as its macOS example. Open Photo Booth and choose Pocket 3 from the Camera menu. This provides a simple place to check whether macOS can display the camera before configuring a meeting app.
On current macOS versions, check the app's camera permission in System Settings under Privacy & Security, then Camera. A browser meeting also needs the site's camera permission. Repeat the microphone permission check if you intend to send audio from the camera or another microphone.
A working Photo Booth preview establishes that one connection. Open the actual meeting app afterward and select the input there too.
Check Audio, Tracking, and Framing
Video and microphone selection are separate. After choosing Pocket 3 for video, open the meeting app's microphone list. If you want camera audio, choose the corresponding Pocket 3 audio input when it is available and watch the input meter while speaking. You can also choose a headset or a separate computer microphone while keeping Pocket 3 as the camera.
For wireless audio, DJI's May 2024 firmware notes specifically document DJI Mic 2 use alongside ActiveTrack in the 4K UVC streaming workflow. Pair the transmitter using the camera's Wireless Mic settings, confirm that the camera receives speech, then check the computer app's meter. A wireless connection indicator on the camera alone cannot confirm what a remote participant hears.
Use a short recording or a second participant to check the selected voice input. Speak from your intended seat, pause, and listen back. Keep the speaker or headphone output set to where you want to hear the call. If speech is silent, inspect mute states and microphone permissions before changing video settings.
ActiveTrack in webcam mode
The same May 2024 notes document ActiveTrack support during UVC streaming. In the normal camera view, DJI's manual describes double-tapping a subject to start or stop tracking. Check the available control on your installed firmware and verify movement in the computer's preview.
Try moving a little to each side within your intended presentation area. Check that the gimbal follows the intended person and leaves enough room around their head. For a seated call, settle the framing before joining. For a demonstration, check that the item you want to show remains visible when tracking follows your face.
If the camera or meeting app offers an additional framing effect, check its state too. Two active framing systems can make it harder to understand which one changed the crop. Our auto-tracking versus auto-framing webcam guide explains the broader buying distinction; this article focuses on connecting the Pocket 3 you already own.
Separate Internal Recording Specs From Webcam Output
There are three places to check resolution. Pocket 3 has its own recording settings, the computer app receives a USB video stream, and a meeting service decides what it sends to other participants. Write down each one separately.
| Setting or specification | What the official documents establish | What to verify on your computer |
|---|---|---|
| Pocket 3 webcam resolution | Firmware v01.04.08.02 added 3840 × 2160 UVC output at 25/30 fps | The selected capture device actually offers and uses that resolution |
| 1080p at 50/60 fps | Earlier notes describe recording at these rates while in webcam mode, with computer output at 25/30 fps | Avoid treating the camera's recording choice as proof of a 60 fps USB feed |
| 4K at 120 fps | DJI lists this under the camera's Slow Motion recording specifications | It does not establish 4K/120 webcam output |
| Meeting quality | The camera's UVC capability describes the input available to software | Check the meeting app's settings and, where available, its outgoing-video statistics |
| D-Log M | Firmware v01.06.08.04 added a 10-bit D-Log M option in Webcam mode | Check color handling in the receiving software before using it for a call |
For a first setup, establish stable video with default settings. If you need 4K input in OBS, set the resolution in the capture source's properties. Enlarging the OBS canvas or changing its final output size does not prove that the camera source is delivering 4K. DJI also calls out computer performance and USB cable quality as conditions for 4K UVC use.
A conferencing service may send a lower-resolution picture than the camera supplies. In Google Meet, for example, inspect the available send-resolution option in video settings. A 4K source selected elsewhere cannot force the service to transmit 4K.
For ordinary meetings, start with the camera's standard color option. D-Log M is intended for a workflow that handles its color correctly; enabling it adds a processing check to your setup.
The manual also describes local recording in Webcam mode with the shutter/record button and playback after leaving that mode. If you want a local backup, make a short test clip and play it back afterward. Check that the local file and the computer capture each contain what you need.
Pocket 3 Webcam Not Working? Check the Symptom
| Symptom | First check | Next action |
|---|---|---|
| Camera charges but never appears | Confirm Webcam mode and a data-capable cable | Connect directly to another computer USB port and reopen the app's input list |
| Preview shows the laptop camera | Inspect the selected video input | Choose Pocket 3 or the matching UVC device and confirm the picture changes |
| Camera appears but preview is black | Check app/site permission and other open camera apps | Close competing apps, reconnect the camera and select it again |
| Video works but there is no voice | Check the microphone input and meter | Unmute the intended mic, verify its permission and make a short recording |
| 4K is missing or unstable | Check firmware and capture-source settings | Establish a stable lower-resolution preview, then retry 4K with a direct USB connection |
| Frame keeps moving or cropping | Check camera tracking and app framing settings | Test each feature separately, then keep the framing behavior your task needs |
If the fault persists, keep your firmware, OS and app versions with the failed result for DJI support.
A Windows, macOS, and Meeting-App Acceptance Sheet
Copy this table into your notes before a rehearsal. Fill it in on each computer you plan to use. The result cells are intentionally unfilled because no hardware test was performed for this article.
| Check | Windows result | macOS result | Actual meeting-app result |
|---|---|---|---|
| Computer, OS, camera firmware and app version | Record versions | Record versions | Record app/browser version |
| USB cable, port and Webcam screen | Record connection | Record connection | Confirm still connected |
| Selected video input and live preview | Record input label | Record input label | Record selected camera |
| Source resolution and fps | Record exposed and selected options | Record exposed and selected options | Record available send quality |
| Microphone input and audible speech | Record device and playback result | Record device and playback result | Ask another participant to confirm |
| Tracking and crop during movement | Record enabled state and result | Record enabled state and result | Check the participant view |
| Stability over the intended session length | Record duration and any fault | Record duration and any fault | Record disconnects or audio gaps |
| Reconnect after unplugging or sleep | Repeat input selection | Repeat input selection | Confirm both picture and voice return |
Keep the completed sheet with the cable you used. If you later change a dock, update firmware or switch meeting apps, repeat the affected checks before relying on the setup for an important call. For other device types, browse the cameras and creative hardware category.
Official sources checked
- Pocket 3 manual, including Webcam Mode on pages 27 and 28
- DJI's cumulative firmware notes through August 26, 2025
- May 2024 firmware notes documenting 4K UVC, tracking and DJI Mic 2
- DJI's computer connection and HDMI FAQ
- DJI's Windows and macOS webcam examples
- OBS video capture source settings
- Apple's camera permission controls
- Google Meet video and audio settings